I love CTMH's stamp sets as they are so versatile! Here you see the stamp set from the Avonlea WOTG used in a VERY different way: to create background paper in a 3 step stamping card.
You can also see that I used some of the left over ribbon from the kit. Because the WOTG's are not purchased by everyone-your additional cards you make using the stamps will have an extra special flair!
Here is the entire card and tutorial so you can get the same effect!
Directions for 3-step stamping
Daisy white card stock cut at:
2 x 3.25 inches
3 x 4.25
4 x 5.25
Cut your coordinating solid color card stock at:
2.25 x 3.5 inches
3.25 x 4.5
5.5 x 8.5-base of the card-fold in 1/2
Stamping instructions:
 First layer your daisy white card stock on top of each other with largest on bottom building up. I used some temporary glue tape underneath to keep the layers from shifting. If you don't have any use any type of dotto/tape runner glue but oil it up so it isn't a permanent stick by rubbing it between your fingers before you put it on the paper.
Then stamp your sentiment on the smallest card stock piece. I do this so I make sure I have room for the sentiment. I love stamping around a page and can get CARRIED AWAY!
Next take your background stamp ( in this case the leafy design) and stamp in a neutral/soft color. I used the new Slate ink. I start close to the center and then work my way around making sure that I turn the stamp so it doesn't go the same direction. Stamp so that it goes across the 3 layers of paper once in awhile. Then come back with your focal/larger designed stamp and a brighter color and fill in the rest of the card. I stamped with smokey plum to match the card stock using the largest geometric shape from the stamp set.
When I was finished I had some gaps that I decided to fill with the small geometric/flower type stamp. I made sure that some of them went from one layer to another and off the edge of the largest paper.
Don't worry if you have gaps between the paper layers when you stamp!! This happens but it gets covered by the background card stock!
Finished stamping? Adhere your stamped pieces to the solid coordinating card stock pieces. Largest white glued to the card stock base.
Here is another very different card I made using the same technique!
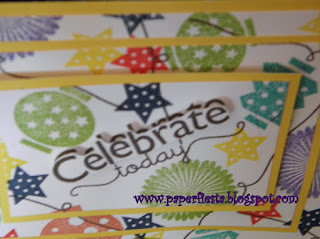
This card uses the Paper Lantern stamp set. Instead of gluing all the pieces flat, I popped up the top layer with foam tape and the word Celebrate. You can see that best on the second picture.
Just like our stamps being versatile, so is this card technique.
Hope you are having a great day partying with paper!
Come back soon. I have finished about 3 projects I'll be posting later this week!
~Sharon


Great Job Sharon!
ReplyDeleteThis is one of my favorite ways to stamp...so easy, yet so pretty and fun!
Thanks for sharing.
Looking forward to more.
The lantern is SO cute!