Friday, August 31, 2012

Clementine Damask Diva Hop

Clementine One Sheet Wonder Cards

Welcome hoppers! You just saw Ashley's fantastic Clementine project on your Damask Diva's Paper Pack hop. I'm the 8th entry on the hop but if you got here out of order you can check out our Damask Diva's blog here.

For this month's hop I decided to do a 1 sheet wonder I found on LeeAnn Greff's website. I have been in a rut and needed to change up my cards. 

What's a 1 sheet wonder?

1 sheet of B&T paper cut into different shapes. Some of them combine to make a design on a card and some are used on their own. These cuts can then be backed with card stock and arranged in a variety of ways. Add a few colored card bases that coordinate and there are endless possibilities.

Why a 1 sheet wonder? 

  • Very little waist! 
  • Huge variety of designs possible
  • Great for punches or sentiment frames from Cricut Artiste/Art Philosophy Cartridges
  • Great way to use embellishment stash up
  • Great way to use scraps
  • Makes 16 very different cards

Very cool!


I love how these turned out! My favorite is the Celebrate card. Oh  and the Fall themed card made the $5 Stamp of the Month set. (See more info below) Or maybe the one with the Artiste bow on the front or the Have a day filled with.... No...OK; I just can't choose!

My cards used several cuts and matching stamps from the CTMH exclusive Artiste Cricut Cartridge collection. I'm really enjoying learning this new cartridge. If you would like to see each of the cards close up I'll be posting each of them this week on my Facebook page: Close to My Heart Paper Fiesta. 

Tips when you try this!


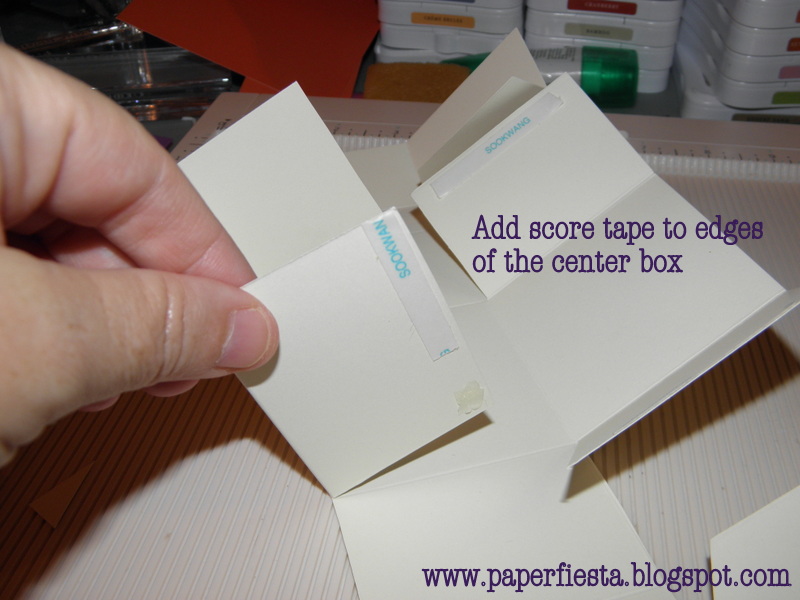
  1. Take the CTMH desk pad or 12 X 12 colonial white sheet and make a template to scale. Label each of the sections as per the instruction sheet. Put this template on your work station and as you cut each piece, place your cut piece on top of the matching section. It will help you keep track of your cuts. And if you make mistakes cutting, like I did, you can adjust quickly. 
  2. Once you select your B&T paper, go through your scraps and pull anything out that coordinates. It will save you time when you want to back pieces of the B&T with a layer or add small paper embellishments. 
  3. Don't forget the ZIP STRIP on the B&T papers! I used a couple different zip strips from the paper pack to add to the cards. I love how CTMH has these little extras that don't cost extra!
  4. Vary the direction of the card from landscaped to vertical. 
  5. Use 3-4 different coordinating colors of 12 x 12 card stock sheets and cut 2 card bases from each. Save the remaining strips for layers and stamping. I looked at the zip strip on the paper pack to see what colors I might have that CTMH recommended. 

Come back soon!

Can't wait until next month when we showcase the Moonlight paper pack! But in the mean time, I'll be posting more great projects as I prepare for my upcoming OPEN HOUSE! So excited to showcase my new Fall Make & Takes and of course the great new CTMH products! So you all come back soon! Or better yet, join my blog by entering your email at the top and get notified every time I add a new post!

Now it is time to hop on over to Jeannie's blog and see what she's created!

I'd love to be YOUR consultant! Click here to order your Clementine paper pack or Artiste Cricut cartridge from me. For support after the sale, I'm available on my FaceBook page and via email or bby appointment on FaceTime(video chat). I'm happy to walk you through any design challenges, a Workshop on the Go, or even one of my projects I post here.

September Stamp of the Month

Just $5 with a qualifying purchase. A great set of stamps at a fantastic price! Order Today!


Celebrate Life~PaperFiesta Style!

Blessings! Sharon


Wednesday, August 15, 2012

Artiste Smash Box with Rose

Such a romantic feel to this!

I just love how this smash box from the ARTISTE cartridge turned out! You'll find this box on p. 48 of the Artiste cartridge instruction booklet. I use Cricut Craft Room and used the fit to page to make the box and lid.  I used the Pirouette stamp (B1409) coordinating shape found on page 56 for under the flower cut at 3.75". The rose is found on page 54 (F key/accent 2) and is cut at 8.375" x 8.514". The leaves are from the same page as the rose but Accent 4 and are cut at 2.861" x 1.806". Thank you to Every Day Cricut for this design!

This is my best rose yet! Here's why:  First I used a Quilling tool (new to CTMH) to help me roll the rose. I also made sure to pull very tight as I rolled which causes the petals to curl down. If one didn't curl, I just folded it down a bit and re-rolled. The more you work with the paper, the softer and more 'memory' it has for the curl. 
Another tip I have is to use your embossing stylus (z1206-a MUST HAVE tool) on the leaves. I ran my stylus over the entire leaf in little circles with the ball end. Then I went over the edges of the leaves even more until they curled up. Taking the pointed end I made the vein marks you can see. These little details really add to the box; don'tcha think? I used Liquid Glass to adhere the rolled flower and leaves to the base.
To give my rose and leaves more depth I sponged ink on both. The rose I added smokey plum and All Purpose Ink in Frost White for the shimmer. If you have CTMH's Pearl Paint that will work great too! For the leaves I used a matching green ink to the paper and the frost white. The butterfly is one from Flitter Paper Shapes and I sponged it with smokey plum ink, frost white, and then dusted it with Prism Glitter while wet. Once dry, I put a small dot of Liquid Glass on the back to fasten it to the flower.

By the way, my box doesn't smash! To keep it from smashing I simply cut out several 1 x 2 inch rectangle flaps from the scrap paper left on the Cricut mat. I scored each of these in 1/2 so I could glue them to the inside of the box where each side meets. This prevents the box from smashing and gives it much better structure. 

Join the fiesta and make your own box! If you'd like the CCR file, please leave a comment with your email address. I'll send it right out to you with a bonus Art Philosophy scalloped flower card if you join my blog. 

For a short period of time you can get the retired Sonoma Paper on the While Supplies Last found here. It is only $3.50 for LOTS of sheets of 2 of the designs from the original pack. Check out several of the other great deals there!

Here are are the other items I used in making this box:

Dry Embossing/Scoring Stylus (z608) 
Flitter Paper Shapes butterflies (z1463) 
 Smokey Plum Ink (z2147)
Smokey Plum card stock (1291)
Bamboo Card Stock (1301), Pirouette Stamp (B1409). And last but certainly not least the Cricut Artiste Collection (z1790).
All these great products can be ordered from me at www.sharon.ctmh.com

And for a limited time with a qualifying purchase of $35 of full retail priced items you get this great 2 page stamp set for $5 to celebrate National Stamping Month. 
And as always, we have a fantastic stamp of the month which is also $5. You can really build your crafting supplies for less by choosing CTMH! We really do make it faster, easier, and simpler!

Party on Crafters! Blessings~Sharon


Friday, August 10, 2012

Cute 2 sheet box tutorial

Can you believe it!?! Takes only 2 sheets: 1 card stock and 1 B&T!

Look at these beautiful boxes my sister made! Denise really 'threw herself' and they turned out sweet! She found the box at Dawn's Stamping Studio. So thanks to Dawn!

What I love the most is that Close to My Heart Border and Texture paper in Lucy and Pemberly take  the same box and make them look soooo different! Love it!

Not to be outdone, I HAD to make one!  I used Stella paper and sunset card stock. Wait-Sunset card stock? If you look closely at the picture below the card stock is Colonial White. That's because I goofed up when I cut the sunset cs and so I decide to move to Colonial White in case I goofed again. 
Mine turned out pretty good but I like my sister's better! LOL! I think popping the different layers of the flowers up added so much! I also think I'd have liked mine better in Sunset cs!  
Okay...so are you ready to join the fiesta and make your own box? Well, grab a glass of your favorite beverage, 1 sheet of card stock, 1 sheet of B&T, your favorite glue/sticky tape, scissors, score tool, and paper cutter. Here you go!!

Cut card stock and paper as follows:
(1) 7 1/2" x 10" Card Stock piece (save the rest for the flower)
(1) 1"x 11" for the belly band
(6) 1 1/ 8" x 2 3/8" Border & Texture paper of your choice
(4) 2 3/8" x 2 3/8" Border & Texture paper

Cricut Cuts: Art Philosophy
Card stock cuts of Flower 8 @ (1) 2" height, (1) 3" hight
1 B&T cut of Flower 7 or if you want a pointy flower use Snowflake 1 @ 2.6 to 2.75 depending on how big you want the middle layer. Cut extra if you want more layers.

Box Assembly
Take card stock base and score on the 10" side @ 1 1/4", 2", 3 3/4", 6 1/4", 8" and 8 3/4"
Turn card stock so the 7 1/2" base is at the top of your scoring tool and score @ 2 1/2" & 5"
Fold all your score lines. 


Turn your paper so the 10" side is horizontal and using your paper snips cut from the bottom up on the 2" score line to the first score line you meet. Then turn your paper and cut to the 1 1/4 " score line. Turn and cut on that same line up to the 3 3/4" line. You'll do this on the other end of the paper and on the opposite side. Here's a picture that will help you figure this out! 


When you finish you'll fold all the cut little "doors" up on score lines that weren't cut. 

Now fold up the center noted in the picture above to make the box. Add a strong tape adhesive to the edges of the card stock as shown in this picture below. I put adhesive on each flap edge. You can see on one side I added it to the outside edge and the other I put it on the inside edge to add strength.


Once you have the center box made, remove 2 triangles from the side flaps. This makes the sides easier to fold up and hold. You add NO adhesive on the side flaps. They should just stay folded.


You have all the hard stuff done! Now you just glue all your B&T papers on each of the faces of the box. I added a couple extra so no sides would be undecorated. It should look like this when completed.

Now just put the long belly band strip around the box and adhere the ends.  This covers the open edges where the sides come up. Don't pull too tight! You have to have some slack so you can slide it off easily. Then create your flower by layering your flower pieces cut from the Art Philosophy cartridge. I used Liquid Glass to adhere mine and added a medium sized Durables Round (z1706) for the center of my flower. Use foam tape or scrap of chipboard if you want more space between the layers, like my sister had on her box.

Flower Power
Denise's flowers and mine have Flower Power! We each took our embossing stylus and rubbed over the entire flower to soften the card stock. We then took our bone folders and added veins in the flowers and curled the edges a bit, just like you would curly ribbon!  I also inked the edges of my box and each of the flower layers with Chocolate ink. I also added some Sunset ink to match the paper but adds a bit of highlight to the petals. 
This was a long one but hopefully you'll enjoy making this cute little 2 sheet box! I'd love to see the boxes you make! Go to my FaceBook page and add your pics to the album I've set up there.

As always, I am a Close To My Heart Independent Consultant and I would love to earn your business! Click on the link at the top of the page to go to my website and order. All orders are supported with help so you USE your products! I can Skype or Face Time with any long distance customer and help you with your projects! 

Party on Paper Lovers! ~Sharon

Tuesday, August 7, 2012

Do you recognize this stamp set?


I love CTMH's stamp sets as they are so versatile! Here you see the stamp set from the Avonlea WOTG used in a VERY different way: to create background paper in a 3 step stamping card.
You can also see that I used some of the left over ribbon from the kit. Because the WOTG's are not purchased by everyone-your additional cards you make using the stamps will have an extra special flair!
Here is the entire card and tutorial so you can get the same effect!
 Directions for 3-step stamping

Daisy white card stock cut at:
2 x 3.25 inches
3 x 4.25
4 x 5.25

Cut your  coordinating solid color card stock at:
2.25 x 3.5 inches
3.25 x 4.5
5.5 x 8.5-base of the card-fold in 1/2

Stamping instructions:
First layer your daisy white card stock on top of each other with largest on bottom building up. I used some temporary glue tape underneath to keep the layers from shifting. If you don't have any use any type of dotto/tape runner glue but oil it up so it isn't a permanent stick by rubbing it between your fingers before you put it on the paper.
Then stamp your sentiment on the smallest card stock piece. I do this so I make sure I have room for the sentiment. I love stamping around a page and can get CARRIED AWAY!

Next take your background stamp ( in this case the leafy design) and stamp in a neutral/soft color. I used the new Slate ink. I start close to the center and then work my way around making sure that I turn the stamp so it doesn't go the same direction. Stamp so that it goes across the 3 layers of paper once in awhile. Then come back with your focal/larger designed stamp and a brighter color and fill in the rest of the card. I stamped with smokey plum to match the card stock using the largest geometric shape from the stamp set.

When I was finished I had some gaps that I decided to fill with the small geometric/flower type stamp. I made sure that some of them went from one layer to another and off the edge of the largest paper.

Don't worry if you have gaps between the paper layers when you stamp!! This happens but it gets covered by the background card stock!

Finished stamping? Adhere your stamped pieces to the solid coordinating card stock pieces. Largest white glued to the card stock base.
Here is another very different card I made using the same technique!

 This card uses the Paper Lantern stamp set. Instead of gluing all the pieces flat, I popped up the top layer with foam tape and the word Celebrate. You can see that best on the second picture.

Just like our stamps being versatile, so is this card technique.

Hope you are having a great day partying with paper!

Come back soon. I have finished about 3 projects I'll be posting later this week!

~Sharon

Friday, August 3, 2012

Avonlea Cardmaking Kit!

My first 5 cards from the WOTG on my craft table!
So glad you visited my blog today! I love making cards and so happy that CTMH have 2 card making kits for the fall! I had so much fun making these. Easy to cut and put together with extra bling and even ribbon. I have never had good luck with background stamps until the stamp in this kit!

I'm still working on my extra cards I'm making with the scraps. When I have more done, I'll post! 
I feel in love with Avonlea and while this Workshop on the Go has extra, it isn't going to be enough for me! I've got the regular paper pack on my wish list so I'm sure you'll be seeing it on several projects this fall. Next blog will have an elegant flower topped box cut from the Cricut Artiste Cartridge. Hope you come back to see this stunning project!

If you would like your own Avonlea Card making WOTG order here.

Party on!
Sharon

Wednesday, August 1, 2012

Damask Divas Avonlea Blog Hop!

Welcome to the Damask Divas Avonlea paper blog hop and Sharon's Paper Fiesta! You have found yourself here from Diana and no doubt you are already inspired to create with this elegant paper!

I absolutely love how versatile this new paper is and how well it goes with the new Pirouette stamp  seen in black emboss on my card. I decided to heat emboss the stamp design here so the pattern from the paper would show through. It was a tough call as this stamp also coordinates with the newArtiste Cricut Cartridge and I thought about cutting the shape out instead. I really do like how it turned out.
Avonlea greeting card front layered design with embossing.

Using scraps (yes SCRAPS!) from the Avonlea Workshop on the Go Cardmaking Kit. I cut the Border & Texture paper to fit an A2 card base made from Colonial White card stock.
I then cut another piece of the same Border & Texture at 2.5' x 4'.  I glued the smaller one on top making sure the opposite design was showing.

Once dry, I rubbed the paper with a dryer sheet (to help with the embossing), stamped with VersaMark, added embossing powder. After removing the powder from the inner green section with small child's paint brush to give it an open layer effect, I heat set the powder.
Inside stamped with smoky plum and slate inks using WOTG exclusive stamps!

Adding sliver shimmer trim, sparkles from the Sparkles Assortment, and a stamped and bling'd banner. evened out the design.

When I placed this on the card base I felt like something was still missing. So I took a small piece of smoky plum card stock from the kit, embossed it with a CuttleBug folder and positioned it to the left. That was it! I adhered all my pieces and then used 2 of the stamps from the Workshop on the Go to decorate the inside of the card.
I love the geometric shapes, multi-layers and the on-trend colors! I hope you do too!

Interested in purchasing these products? Click here.  Here is a list with their order number and prices.
Supplies used:
Avonlea WOTG (G1041~$29.95) What a bargain!
Avonlea WOTG exclusive acrylic stamps
Pirouette stamp (B1409~$9.95)
Slate Ink (z2173~$5.25)
Sparkles Assortment Black/gray (z1754 ~$2.95)
Sparkles Assortment Clear (z1752~$2.95)
Silver Shimmer Trim (z1799~$4.95) LUV IT!
Colonial White Card Stock (1388~$14.50)
Craft Heater (Z555~$29.95)
Cuttle Bug embossing folder
Want to see some of my cards from the Workshop on the go kit? Then come back tomorrow. I'll be partying on with many more projects to come! Your next stop is the wonderful Ashley at cutesyandsillscrafts.  Keep the paper party going!
Blessings!~Sharon