Wednesday, August 28, 2013

Clean and Simple Monogram Cards

Need a quick gift? How about a monogram card?

Today's cards are simple gifts I made for two friends using the retired monogram and Eclectic Edges boarder stamps from CTMH.  Luckily, they have the same initial as I do! Don't have a monogram or Eclectic Edges-no worries! YOU can easily use any 1 to 1 1/2 inch Alpha stamp and any boarder set you already have to do this! Check out the cards!

Like I said, these cards are so easy to make! I made 4 card bases out of Daisy White card stock cutting it down 12"x12" sheets into 8.5"x11" and then cutting them in half. The extra white pieces were used to stamp with the edge stamp in our Black Exclusive Ink and then I sprinkled on our Clear Detail Embossing Powder and heat set it. I love how it came out! Clear, crisp and shiny. The black card stock behind the stamped image is 1"x5.5. These were glued together with our very own Bonding Memories Glue

Artiste Cricut Fancy Frame

The monogram was stamped on a fancy frame I found on our CTMH Artiste Cricut Cartridge. While this cartridge has lots of 3-d items that are super cool, don't forget it has trendy shapes to add to your layouts and cards! In this case the original image has a circle cut out of the middle. But I use Cricut Craft Room and hid the contour which took out the whole in the center and gave me a perfect place to stamp my monogram. You can find the cut on p.74 Accent 3 of Mother's Day projects. It is so lacy and beautiful. I thought it worked perfectly with the 
style of the stamps. This one is cut at 2".  It is popped up with some foam tape to add dimension.

Add an extra touch!

Don't forget to add an extra touch by stamping the envelopes. Some I stamped with the same edges and others (see top picture) I used the monogram stamp. I also created a nice card box to hold the cards decorating it identically. I found the tutorial video for the box at Frenchie Stamps. She has some awesome tutorials available. 

I can't wait to give these gifts to my friends! If you would like any CTMH products, shop here!
If you would like support or classes both are available online or in person! Just email me!

Blessings!

Sharon


Wednesday, August 21, 2013

Bend 'em, Curve 'em, Get the MOST out of CTMH stamps!

One really cool thing about the CTMH Acrylic Stamp sets is that they are soooo flexible! You can bend, curve or easily mask part of the stamp using several different techniques!

So Easy to Mask by Bending

In this Cozy Cat design I took the purrr from the entire sentiment you see at the bottom of the circle and used only the purr by wrapping the left side of the stamp with the word You're around my acrylic block and since the block/stamp is see through, I only inked up the letters p-u-r-r-r. If I did get a bit of ink on the dash or 'fect' part of the stamp I simply covered the pear paper with a Post-It ensuring that the ink would go on it instead of the card stock!


This card's sentiment Treasured Friend was also curved on the block. I did it by putting the pre-cut banner (cut using one of our great Cricut Cartridges!) down on my VersaMat and then laying my stamp right on top. Since the acrylic stamps have a bit of stickiness to them, with some pressure they will stay. Then I placed the acrylic block on top, pushing lightly to get it to stick to the block but making sure the stamp didn't shift as I pushed. This sounds so much more complicated than it actually is! Then I just inked up the stamp and created this great curvy image!


Even more Curves

This picture shows how much the stamps can be super curved! The slate rope image at the top of this card from the Avonlea Card Workshop On the Go kit is actually a straight boarder image. The card has 2 of the images being stamped so that they meet just left of the middle of the card. This one I did a bit different. Instead of curving the stamp set on the paper, I curved the stamp right on the block and practiced a few times on my grid paper until I got the curve I liked best. And again, because our stamps are 'Clearly the BEST' you can see right where to stamp and so overlapping the design was a snap!

Design your own

Not enough versatility? Well, then try this: Make your own designer paper! Simply random stamp with 1, 2 or a whole set of stamps on your card stock. I use this often when I know someone's favorite color or I need to use colors not in our current paper packs for a project. This card is made with the Love Blooms stamp set. The top is just random stamping on the card base. The flowers and leaves on the bottom 3rd of the card were stamped and cut out using our amazing micro-tipped scissors. We now have them available in regular and non-stick! I loved the regular ones so much, I bought 2 so I could use them during classes. The new non-stick ones are at the top of my wish list!

Interested in CTMH products?

There are so many great ways to use our clear acrylic stamp sets! I'd love to introduce you to our line of products. Know what you want already? Then please place an order at my online store. If you would like to host your own gathering and earn hostess gifts, please contact me! Even if you live across the country, you can hold an on-line party and invite your friends via email. They make online purchases and YOU reap the rewards!  

Live in South Texas and need a Girls' Night Out?

If you live in the Rio Grande Valley of Texas I'd love to be your consultant! I have a small studio in my home where I hold gatherings, crops and classes. Any of the Workshops on the Go or projects on my blog can be made! Cost depends on the projects you want to do but usually ends up much less than a movie and snacks! Get a group of girls together or even mother-daughter teams and we can have lots of fun scrapping or card making in my studio! 

You may order products on line at www.sharon.ctmh.com or clicking here. You may contact me to host a party or gathering by leaving a comment here or on my FaceBook page!


Sunday, June 30, 2013

Pre-order Special on CTMH's New Cricut Cartridge: ARTBOOKING!

Unique designs ~ Mini-Books ~ 12x12 Layouts

CTMH and Cricut have done it again! Introducing the new Artbooking Cricut Cartridge offered exclusively from CTMH. With over 700 images, 15 layout themes, and 10 mini-books this is the cartridge that will take your layouts, cards and decor to the next level. 

Here's what you get:

  1. The Exclusive CTMH Artbooking Cartridge with over 700 images (fonts, mini-books, layouts)
  2. Three D-size Coordinating My Acrylic Stamp sets
  3. Three Coordinating 12 x 9 Dimensional Elements (chipboard)
All for $99! 

Pre-order Special Available now through July 29th!

My pre-order special includes FREE shipping and TAX. Cartridge bundle will come directly from the company as soon as they are available. Your name will be entered into a drawing for $25 credit towards your next purchase once I have $150 in pre-orders. Order now through Paypal!


I'll be ordering my cartridge tomorrow during consultant pre-view! As soon as I get it I'll be posting pictures and tutorials. And if that isn't enough, so will CTMH! They have a multi-week on-line tutorial planned starting in September to make sure you get the most from your cartridge!

The Paper Fiesta is just getting started!
Sharon

Friday, May 31, 2013

Damask Diva Tommy or Later Sk8r June Blog Hop!

Thanks so much for joining the Damask Diva Tommy or Later Sk8r Blog Hop! If you are coming from  Tracy William's blog then you are in the right place! If you joined the hop because you are one of my followers, you won't want to miss ANY of the great projects so I recommend you click here to get the entire list of participants on the Damask Diva blog. A great place for inspiration from the team led by the fabulous Mandy Leahy!

I was so excited about this month's hop and knew exactly what I was going to do with the Tommy Paper Pack which has a nautical theme! But then time got away from me and that project had to go on hold {tear} So instead, I decided to make a Later Sk8r card with one of my favorite A-size stamps!

My Later Sk8r project!

Ok, so Later Sk8r is the PERFECT paper for boys: Gears, Sk8boarding.....but all my nieces are, well...nieces! But the colors in this are so great that they work for so many different projects! I can imagine using these sheets for any athletic or adventure scrapbooking or even with the blues for some accents on a beach page! But in this case I used the paper for a simple but stylish card with my furry friend from Cozy Cat (A1140). Which is so affordable at $6.95! 

Paper piecing!

I wanted to give some dimension to the cat so I stamped the image 3 times. Twice on the dotted paper{Shhh! Don't tell anyone! That paper comes from the Claire Paper Pack} and one time on the plaid paper. Then I fussy cut the images out and layered them. You'll notice I have 2 layers on the body and the third layer is the nose! These were popped up with our fabulous foam tape. I like the tape for just this kind of project where I need really small pieces and a few really long ones to add stability.  I used a marker to color in the nose and collar and a small sparkle for the charm.
To add just a bit more bling, I adhered the Green & Blue Epoxy Bubbles (Z1806) which work perfectly with this paper pack! For only $3.99 they pack a great punch that doesn't knock out your pocket book! Looks like need to reposition one of them to straighten them out! 

Card Base and Inspiration

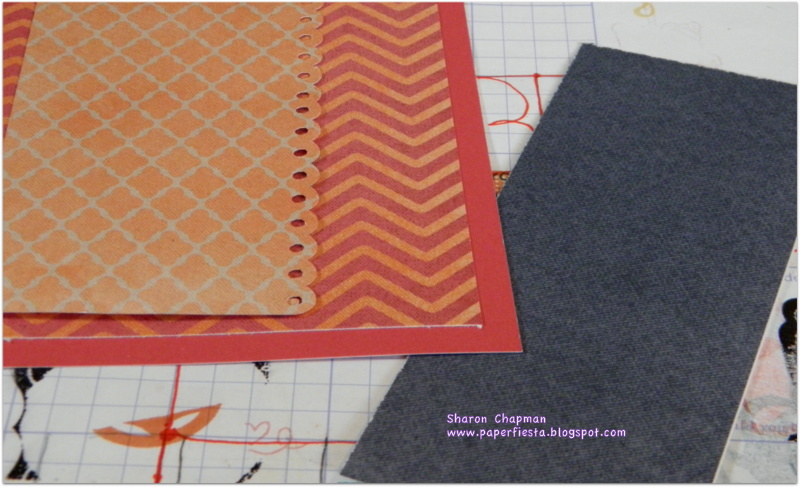
Normally I wouldn't talk a lot about the card base but I think this one is pretty cool! All of it comes from the Later Sk8r paper pack! The top strip is the Outdoor Denim card stock~which is another thing I love about our paper packs-no guessing! The card stock that coordinates is right in the pack!  The middle strip is the zip strip from one of  the sheets but I actually cut it wider than the strip so it included some of that beautiful blue. The bottom is another texture paper which looks like the metal groves from inside a truck bed or some tool boxes. Finally the slate and pear pieces that were layered on top are at the size. I cut the circle using my Cricut Art Philosophy{heart}and CCR. I cut the circle at 3 inches. The slate card stock was hand cut and both of these pieces as well as the finished card were sponged in Outdoor Denim Ink. I can't take credit for this design! It comes from Operation Write Home, a fantastic way to give back to our nation's armed forces by sending blank cards so they can write home! They have over 150 different card sketches for download. While that is fabulous enough....each of the sketches includes the dimensions! This makes them so easy to do! 

Another note of inspiration

The idea of paper piercing the cat came from Allisa whose card I spotted on Pinterest! She is another CTMH consultant that does amazing work! You can go to her inspiring blog by clicking here. It will take you right to the Cozy Cat card! 
A huge thank you to both OWH and Allisa for your designs and ideas!
And of course, I couldn't let this opportunity go by to show you my feline inspiration as well! 
This is Baby, a stray that came into my garage over 10 years ago as a tiny little kitten. She is now quite at home on my bed! She is just one of 3 cats who live with someone who considered herself a dog person! These independent, yet loving creatures can sneak up on your heart!


Speaking of Pinterest, I'd love it if you followed me there, on Facebook(click the link at the top left on this blog) or joined my blog! 
Thanks for stopping by! More inspiration awaits on Cindy Fowler's blog!

Sharon 


Monday, May 13, 2013

Show me Your Craft Room Space


I am posting today as a guest designer for Craft It Up & Link It Up Linky Party hosted by Tara of Craftin Desert Divas! Every other Monday will mark the beginning of a new semi-weekly linky party and you could win fabulous prizes!!

This linky party theme is Show your Craft Room. The sponsors are Robins Nest, Robin Carroll, and Craftin Desert Divas! That's right~3 great prizes!  The more you link up, the better chance you have to win.  Visit Craftin Desert Divas for all the rules and to play along.


Here is what I created for this linky party....

My Craft Room

My craft room is pretty simple! I reused several pieces of furniture I already had like my old computer desk, wardrobe, end table and dresser. I did purchase a metal shelf and a large fold up table from Target when they were on sale. I also turned a jewlery armoire into my photo area. Right now I have a black through from Wal-Mart as part of the background. Sometimes I use a plastic storage container and make my own light box by lining it with colored card stock. 

I love my Cricut and BigShot!

My Cricut Expression is my go to machine. I started paper crafting with this as my first purchase! So I don't have many dies or punches.  My go to cartridges are CTMH Art Philosophy and Artiste. I use my BigShot for embossing which I love to do!
 My yellow and blue baskets keep my in use stamps and embellishments at hand. Once I'm done with a project, I put all the supplies back. Well, that's the plan anyway! Here are some close up looks at how I've organized my supplies. Again nothing fancy but it works! At least for now....


I love my new CTMH Large organizer for my stamps. I'm still trying to organize my sets for ease of use. But I'm pretty sure I'll end up purchasing another one since they hold so many and are under $25! 

Thanks and...

I want to thank Robin Carroll for inviting me to be a guest designer! I'm also so glad you stopped by today to check out my craft room! I hope you'll browse through some of my other projects I've posted! Since I'm a CTMH consultant most of the posts include their products. If you like what you see, I'd love it if you followed my blog and FaceBook page!  Now it is your turn....


Hope you will Craft It Up &

Link It Up!!!

Tuesday, April 30, 2013

Damask Diva's Claire Blog Hop

Thank you for joining in the Damask Diva Claire Blog Hop! If you are coming from Cheryl McCain you are in the right place! Don't forget to go to our group blog to enter for GREAT Giveaway from Cindy Fowler. That's also where all the links to each blog is posted in case you get lost along the way!

Claire Flair!

If you participated in Mojo Monday recently you'll recognize 2 of the cards below! I started using this pack to enter and of course {blush} never got them posted. The other cards were made from other inspiration including the Chantilly card workshop using Claire instead.  Claire is full of vibrant color with a bit of flowers, chevrons, polka-dots and denim. It is a very versatile paper that can go country, sweet, or geometric.


Here you get a little peek inside the card! I used stamp set B1408, Buttons, Bits, and Bobs to add a design behind a clear button AND to decorate the inside of the card. You'll note I used white daisy ink to add the button holes to the centers of the stamped images. The Girls Rock! stamp set provided a matching boarder to the zip strip on the front from the Claire paper pack. Love it!
And of course we have LOTS of button assortments to choose from.

 I love the geometric designs that can be paired with this pack! So I remembered that the Chantilly Card WOTG has an exclusive acrylic stamp set that would work perfectly with Claire! This grouping on the front comes from this set! I also used the cake and sentiment from the stamp set on the inside.

What's next? I have 1 more card I haven't finished yet. It is using a design from Deconstructed Sketch no. 85. I hope to add it to the entry and for sure on my Facebook page.
Speaking of Facebook, I'd love you to follow me on FB! It is easy to do, just click on the link on the left hand side of this blog!


Thanks for hoping by!  Latisha is the last stop on this hop! Check out her great project!
Several Divas are also doing a Dream Pop Hop so be sure to check that out also.
Party on Crafters!
Sharon


Friday, April 5, 2013

My First MOJO Monday Card!

Buzzzz! Mojo 287 meets Buzz and Bumble!

This week's Mojo Monday challenge is my first EVER and I'm so excited! This fantastic sketch was created by Julee for Mojo Monday Challenge.


Fabulous You!

This is a standard A2 card measuring 4 1/4 by 5 1/2 inches. The card has a tent orientation so my 8 1/2 X 11 inch card stock was cut in half down the 8 1/2 inch side and the 11 inch side was folded in half at 5 1/2 inches. I used CTMH's Colonial White card stock. All the rest of the papers used on this card came from the Buzz and Bumble paper pack.
The background and foreground circles were cut using the CTMH's Artiste Cricut Cartridge. The shape can be found on p 46,  Y  the small one is 1 1/2 inches and the larger one was cut at 4 1/2 by 3 1/2 so it came out oblong instead of a circle. I use Cricut Craft Room and played with it a bit. Both were cut using the Sunset card stock.  I also cut the Goldrush card stock but this time using the Art Philosophy cartridge as it has many of the basic shapes. It was cut at 2 3/4 by 3 1/2 inches. All edges were sponged with Cocoa ink
The background and accent papers were cut by hand. The background was cut at 4 1/8 by 5 3/8. The accent striped paper measures 1 3/8 by 4 1/8. The hounds tooth strip {LUV} is a zip strip from one of the papers and it measures approximately 3 3/4. It was a scrap from another card and worked perfectly! I used our paper snips {fantastic} to trim the V shape out of the right end.

The stamped image is one of the beautiful bird images in the Fabulous You stamp set. I stamped it using Cocoa ink and colored the image in with colored pencils. I attached 3 brads from the Metal Assortment  in the upper left hand corner and used one to attach the zip strip and small scalloped circle to the card. The main image is popped up using our Foam Tape. When I first saw the tape, I thought it was a silly idea when most companies have pre-cut foam squares or hexagons. I WAS WRONG! I love how I can cut just the right amount for the project. The tape comes with 2 widths: 1/4 inch and 1/2 and at $5.95 it is a steal since it lasts so long! All the remaining pieces were glued down using CTMH's Bonding Memories adhesive.

Here you can see the inside of the card. I used one of the sentiments as well as a decorative boarder that Buzz and Bumble My Stickeasy Assortment added to the right of the sentiment. The background paper is an antique newspaper print also from the Buzz and Bumble pack.
come with the stamp set. To add a touch of color there is a small flower sticker from the

I really enjoyed making this card! Both the colors and the design of this card are outside my 'norm' and stretched my creativity!  


New to Crafting? 

These products and so much more are available on my Close to My Heart store. If you are new to stamping/scrap booking/card making and don't know where to start TRY MY STARTER KIT and SAVE!
My starter kit includes the following: 
1 3x3 or 2x3.5 block 
1 paper pack of your choice 
1 coordinating ink pad of your choice 
1 A size stamp set ($6.95) 
1 Bonding Memories glue pen
Cost: $38.00 +tax and shipping. Email me if interested. Want a different size stamp set? We'll just add the difference to the total cost.

Extra Special Offer for April: Free A-size stamp & Mystery Hostess

Order $60 or more products by joining my April Showers gathering on my online store and you'll get a free A-size stamp. You place your order and then email me the stamp you'd like to get FREE and your mailing address! I'll mail your A-size stamp in a separate envelope.  Sorry, this offer is only available for US residents in the lower 48.

Mystery Hostess (US residents)

Once the April Showers gathering has sales of $150 all those who ordered will be entered in a drawing for hostess. The winner will get to order $25 in free product! If the sales total over $250, the prize increases to $40. Be sure to tell your friends!

Fiesta on my scrappy friends!
Sharon